Showing posts with label LENOVO. Show all posts

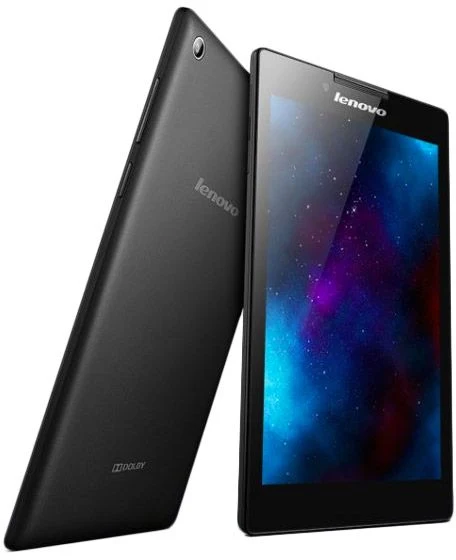
الابيض والاسود Lenovo Tab 2 A70-30HC تفليش


Lenovo Tab 2 A70-30HC


إذا كان الجهاز المراد تفليشه الخاص بك ميت يجب تفليشه باستخدام الفلاشة الصحيحة بالضبط عن طريق الروابط التالية:

- أولا تحميل الفلاشة الصحيحة للجهاز (روابط السحب أدناه)

- استخراج الملف وحدد ملف scatter file فى SP Flash Tools ، اختر تنسيق format all  ثم اضغط على DOWNLOAD

- إذا كان الجهاز يعمل  وتريد فقط أن تعمل ترقية، اضغط VOL- وأدخل كابل USB.

-إذا كان الجهاز ميت هناك طريقتان للتفليش :


1- بدون بطارية >>> يمكنك إزالة الغلاف الخلفي وفصل البطارية وتوصيل الكابل من دون بطارية، 

عندما تبدأ العملية على SP Flash Tools قم بإعادة اتصال البطارية أثناء التفليش.


2- مع البطارية >>> توصيل الكابل والضغط على VOL-  + الباور مع انتظار البرنامج للتعريف على الهاتف وبدء التفليش.


الهاتف الرسمى لكل جهاز موجود تحت كل جهاز منفصلة مع العلم ان كل جهاز وليه فلاشته الخاصة به ولا تقوم بتفليش جهاز بفلاشة الاخر لانه حيموت الجهاز


لينوفو 2 A70-30HC  الأسود تحمل من الرابط التالى

A7- 30HC_S126_150824_ROW


Lenovo Tab 2 A70-30HC

لينوفو 2 A70-30HC الأبيض - تحميل من الرابط التالى

 A7-30HC_S0029_151021_ROW


حصريا لينوفو Vibe P1m طريقة التفليش + رووت + اصلاح سيريال IMEI


حصريا طريقة تفليش وعمل رووت واصلاح سيريال IMEI لهاتف

LENOVO VIBE P1m


أولا عملية التفليش:

سوف نستخدم البرنامج المعتاد فى تفليش اجهزة ال MTK وهو SP Flash Tool

خطوات التفليش: يرجى اتباع الأتى:

1 - حمل الفلاشة P1ma40_S027_151123_ROW  .

2 - قم بفك الضغط عن الفلاشة ( لا يوجد باسورد للفلاشة المضغوطة).

3 - افتح برنامج التفليش واختار ملف (MT6735M_Android_scatter.txt) 


4 - اختار الامر (Format t All+ Download) .


5 - اغلق الهاتف وانزع البطارية واكتب ارقام السريال IMEI فى ملف نوتباد على سطح المكتب او اى مكان تختاره


6- بعد اختيار ملف التفليش واختيار امر التفليش بالبرنامج اعد وضع البطارية ثم قم باختيار أمر DOWNLOAD ثم وصل الهاتف بالكابل وهو مغلق

7- انتظر حتى يتم التفليش بنجاح حتى ترى ايكونة نجاح التفليش كما بالشكل التالى
(ملحوظة اذا لم يتعرف البرنامج على الهاتف وبدأ التفليش - يرجى مراجعة تعريفات الهاتف بالجهاز)


9- بعد نجاح التفليش قم بنزع الكابل وقم بتشغيل الهاتف وانتظر (سوف يأخد وقت فى الفتح بعد التفليش - لذا يرجى الانتظار)

الأن تم بنجاح التفليش يرجى اتباع الخطوة التالية وهى عملية الروت وهى ليست خطوة مهمة للمستخدمين العادين - لذا يرجى عدم تجربة هذه الخطوة للمبتدئين حتى لا يتم فقد الجهاز 


هذه الخطوة على مسئوليتك الشخصية وانت فقد تتحمل مسئوليتها


---------------------------------------------------------------------------------

ثانيا عمل الروت:

كيف يتم عمل روت لهاتف LENOVO P1m؟

الاجابة على هذا السؤال بالخطوات الاتية ( يرجى العلم انى شخصيا حاولت مرارا وتكرارا عمل رووت لهذا الجهاز والحمد لله وصلت لهذه الخطوات عمليا وتمت بنجاح)


أولا قم بتحميل الملفات الاتية وقم بوضع فى مجلد جديد على سطح المكتب او اى مكان تفضله:

1-  ملف تفليش الريكفرى المعدل (MT6735M_Android_scatter)

2- ملف الروت المستخدم UPDATE-SuperSU-v2.46

3- الريكفرى المعدل المستخدم TWRP Recovery


الان سنستخدم برناج فلاش تول مرة اخرى لتفليش الريكفرى المعدل باتباع نفس خطوات التفليش السابقة ولكن بوضع علامة صح على تفليش الريكفرى فقط ثم اختار ملف الريكفرى المعدل الذى قمت بتحميله ثم اتبع باقى الخطوات 

- بعد تفليش الريكفرى بنجاح قم باعادة تشغيل الهاتف مرة اخرى 

- قم بنسخ ملف الروت السابق تحميله الى كارد الذاكرة الداخلية مباشرة وليس تحت اى فولدر.

- قم باغلاق الهاتف نهائى

- الان قم بالضغط على كل من زرار التوطية والباور ولا تترك الازرار حتى ترى ثلالة اختيارات والذى نختارمنها اول اختيار وهو الريكفرى 


 - بعد فتح الريكفرى اسحب الامر بالاسفل الى اليمين ثم اضغط على Install وابحث عن ملف الروت ثم اضغط عليه سيسألك مرة اخرى تأكيد الاتنصيب قم بالسحب لليمين للتأكيد.
- بعد نجاح التنصيب اضغط على Reboot System لتأكيد إعادة تشغيل الهاتف.

- بعد التشغيل سوف ترى ايقونة الروت مع البرامج وهو برنامج superuser

والان تم عمل الروت بنجاح

---------------------------------------------------------------------------------

ثالثا وأهم خطوة ولكن ليس كل الحالات تحتاجها اذ انها بعد التفليش يرجع السريال تلقائى وبعض الحالات الاخرى يفقد السيريال ويظهر 00000000000000


كيفية إصلاح سيريال LENOVO P1m 


بعد اتباع الخطوات التالية سوف تقوم باصلاح السريال بنفسك بنجاح:


- اولا قم بتحميل البرنامج المستخدم فى هذه الخطوة 

"MauiMETA_exe_v9.1548.0"

- بعد التحميل قم بتثبيته مثله مثل اى برنامج ويندوز عادى 

- بعد التثبيت قم بفتح البرنامج واتبع الخوات كما بالشكل التالى:


- بعد توصيل الهاتف بالبرنامج بنجاح اضغط على القائمة باليسار واختار 
 IMEI download


- ستظهر قائمة السيريال كما بالشكل الأتى:


فقط قم بالضغط على  NVRAM Database File


- قم باختيار ملف الداتا (ضمن ملفات الفلاشة المستعملة بأول خطوة) 

BPLGUInfo file (BPLGUInfoCustomAppSrcP_MT65**...)


- أهم خطوة - بعد تحميل ملف الداتا ستجد ظهور SIM1 & SIM2 كما بالشكل التالى 


- فقط اكتب السيريال الاول بخانة IMEI ولكن اكتب فقط اول 14 رقم ستجد الرقم الاخير يكتب تلقائى - ثم قم باختيار SIM2 واكتب اول 14 رقم 


- بعد الكتابة اضغط على DOWNLOAD TO FLASH


- عند كتابة السريالات بنجاح والضغط على امر Download to Flash  ستجد التأكيد بنجاح بالأسفل بعبارة  (Download IMEI to flash successfully)


كما بالشكل التالى:


- الان قم باعادة تشغيل الجهاز بالضغط مطولا على زر الباور حتى يتم اعادة التشغيل.


- للتأكد قم باتصال *#06# ستجد ارقام السيريال تمت بنجاح ومبروك عليك


Lenovo P1m flashing Arabic and FIX IMEI


Full tutorial for flashing, rooting, and New repair IMEI for two SIM


FIRST FLASHING:

Flash using normal flashing way by SP Flash tool

How to flash:

1 - Download P1ma40_S027_151123_ROW flash file working 100% with me.
2 - Extract downloaded file.
3 - Open flash tools and select (MT6735M_Android_scatter.txt) file


4 - To flash a clean ROM, So select (Format t All+ Download) option on smart flash tools.


5 - Turn off your phone, remove battery, write device 2 IMEI numbers written on the back of phone. (you will need to repair IMEI after flash).


6- When flash tools is ready get in battery back
7- Connect usb. (must see driver under ports on computer management).
8- Wait to fully complete and you will see right mark appears.


9- Remove USB and turn on your device, wait until complete and open well.


Now the flash is done, let's go to second section (Root).

---------------------------------------------------------------------------------
SECOND ROOTING:

How to root Lenovo P1m (P1m40)?

First Download the following and put all files on one new folder on desktop:

1- Download Scatter file for rooting (MT6735M_Android_scatter)
3- Downland TWRP Recovery


Now Install Recovery by Sp flash tool:

1. Copy UPDATE-SuperSU-v2.46 you downloaded to sd card "NOT into folder".

2. Run as Administrator the Sp flash_tool.exe 


3. Click on “Scatter-loading” and browse the scatter file MT6735M_Android_scatter.txt, you downloaded above.


4. Now it will show like this, and on recovery press to load TWRP recovery.


5. In the menu “Option” tab, go to “Download“, and put a “tick” in the “Storage Checksum“.


6. Now hit the Download button


7. Now turn off the phone and wait for 10-30 seconds


8.  Connect your Phone to PC via USB, this will start the flashing process.


9. Once the process has completed, we will see a huge green tick. Now we can disconnect the phone from the cable. You have successfully installed TWRP recovery

10. Make sure phone is switched off. 


Now first press and hold volume down button, then press power button until you see the menu of the three option like first one is recovery, second one fast boot. Now use the Volume Down button to navigate to recovery and press Volume Up button to select it.
11.  Browse the "UPDATE-SuperSU-v2.46" from your external SD card and flash it

12. Reboot your Phone


Now you have root access on your Lenovo Vibe P1m. 

13. Open Lenovo P1m and go to application you will find Superuser open and follow instructions.
---------------------------------------------------------------------------------
Third and IMPORTANT Step is "how to fix IMEI for Lenovo P1m:


Sometimes after you flashed your device and dial *#06# you will find Serial No. (IMEI) 00000000000000.


by this guide you will fix that serial with an easy way, Just follow below steps:

1- Download this software we will use it,  "MauiMETA_exe_v9.1548.0"

2- Open MauiMETA after install it like as any program setup way.
3- follow this picture 


4- when connected successfully, Click on the drop down at the top left corner and select IMEI download


5. The IMEI Download box should pop up. Click on Change NVRAM Database File


6. In the window that pops up, navigate to the location of the BPLGUInfo file (often named like BPLGUInfoCustomAppSrcP_MT65**...), select it then click Open


7. You should see the path to the DB file under NVRAM Database File. Click SIM_1 or SIM_2 depending on which you wish to write IMEI to. Now, enter the first 14 digits of the IMEI you wish to write. The digit entered in the Check Sum box will be the 15th digit of the IMEI. Once done, click Download To Flash


8. Once the IMEI has been successfully written to the selected SIM slot on the phone, you should see a message at the bottom saying Download IMEI to flash successfully


9. Switch off the phone either by taking out then reinserting the battery or holding the power button till it goes off. Once off, boot up the phone and dial *#06# to confirm that the IMEI was successfully written to the phone


Lenovo Tab 2 A70-30HC Stock Firmware Black & White

Lenovo Tab 2 A70-30HC Stock Firmware Black & White


If your Tablets is DEAD you must flash it using correct rom for exactly model by below links:


- First download the stock rom (Tow Links below)

- Extract the file and select scatter file on SP Flash Tools, choose format all option and press DOWNLOAD

- If tablet is working and just want to reflash or upgrade, Press VOL- and insert the USB cable.

-IF YOUR TABLET IS DEAD THERE IS TWO WAYS TO FLASH:

1- WITHOUT BATTERY >>> YOU CAN REMOVE BACK COVER AND DISCONNECT BATTERY AND CONNECT CABLE WITHOUT BATTERY, 

WHEN PROCESS START ON FLASH TOOLS RECONNECT BATTERY WHILE FLASHING.


2- WITH BATTERY >>> CONNECT CABLE AND PRESS VOL- WITH POWER UNTIL FLASH TOOL DETECT TABLET AND START FLASHING.


STOCK FIRMWARE DOWNLOAD BELOW HERE FOR EACH MODEL

The Black Color:

Lenovo Tab 2 A70-30HC Black

Lenovo Tab 2 A70-30HC Stock Firmware Black

A7-30HC_S126_150824_ROW

The Whit Color:

Lenovo Tab 2 A70-30HC White

EXCLUSIVE

Lenovo Tab 2 A70-30HC Stock Firmware White -

 A7-30HC_S0029_151021_ROW


How to root Lenovo Vibe P1 step by step


Lenovo Vibe P1


How to Root Lenovo Vibe P1 Phone on android M 6.0.1

Please follow below steps carefully at your own risk:


Requirements:

First Step - Downloads


 Download all files below and install it on your PC:

- Vcredist_x86.zip
- QPST_2.7.422.ZIP
- Qualcomm_USB_Drivers.zip
- Rom used P1a42_S272_160506_ROW_QPST

Second Step - Drivers

- Turn off phone and then press (VOL +) and then connect USB.
- Open the Device Manager on your computer to make sure the phone's driver is appear ok.
- It should be with name - (Qualcomm Lenovo HS-USB QDLoader 9008) under the list of COM & LPT ports.
- If you find driver is ok then you are ready for flashing rom.

Third Step - FLASHING

- After you download and install QPST_2.7.422 open it.
- Only if it not appear when you start program, Press (Select Port) and chose (Qualcomm Lenovo HS-USB QDLoader 9008 (COM *) port.
- Press (Browse) next to (Programmer patch) and choose (prog_emmc_firehose_89.mbn) file from extracted rom folder.
- Press (Load XML) … and choose (rawprogram0) then choose (patch0.xml)
- Press (Download) and wait until it is finished and do Restart.
If it not do restart by self, just press Volume UP + Power for 10 to 15 seconds


Fourth Step - flashing recovery

- If the device has updated rom such as (S286), just make the previous steps to return to the S272 otherwise do the following:

1 - flashing bootloader unlock by selecting (rawprogram_unlock.xml) instead of (rawprogram0) on program.
2 - After successfully restart go to developers options in the settings menu of your phone and choose OEM unlock.
3 - If the phone is still locked, type the following command on CMD <<<<fastboot oem unlock-go>>>>.
4 - after confirming opened bootloader do flash TWRP recovery by choose rawprogram_twrp.xml.
5 - after flashing is done now restart phone on recovery by pressing (Volume UP+Volume DOWN then Power).

Finally install Root (SuperSU)

If you have completed all above steps successfully, installed recovery, and opened bootloader, So your phone now is ready to be rooted by following last step:

- Download the latest version of the famous SuperSU root file
- Then placing it on the storage card (SDCARD).
- Reboot phone on recovery and install zip root file.

-------------------------------------------------- -----------------------------------
If this article and tutorials helped you, So please mention the source.